Digiscoping is a technique that bridges the gap between observation and photography, allowing you to take stunning photos or videos of distant subjects using a digital camera or smartphone attached to a spotting scope, binoculars, or a telescope. It’s an accessible and affordable alternative to expensive telephoto lenses, making it a favorite among birdwatchers, wildlife enthusiasts, and amateur astronomers.
The Essential Gear for Digiscoping
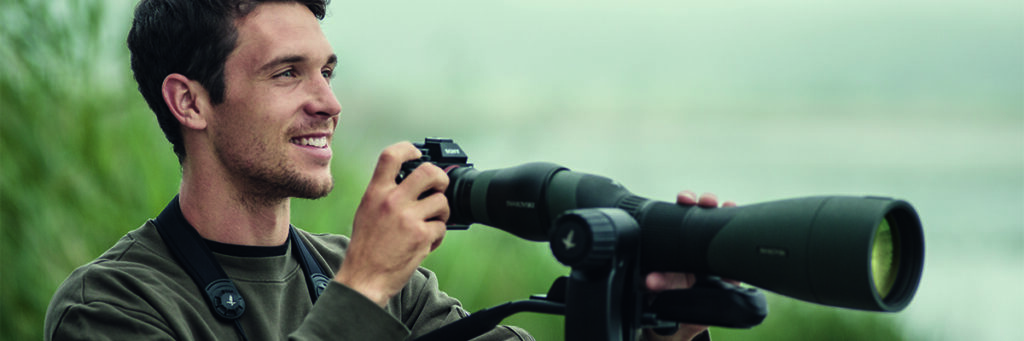
To get started, you’ll need three main components:
- Your Optics: While digiscoping is possible with binoculars or a telescope, the most common and effective tool is a spotting scope. Spotting scopes offer higher magnification (often 20x to 60x or more) and are designed for stable, long-distance viewing. Look for a scope with a large objective lens (e.g., 65mm or 85mm) to ensure a bright image, especially when zoomed in.
- Your Camera: A smartphone is the most popular choice for digiscoping due to its convenience and excellent video capabilities. Its compact size and ease of use make it perfect for beginners. For more advanced users, a compact digital camera (point-and-shoot) or even a DSLR can also be used, though they require more specific adapters.
- The Adapter: This is the critical piece of equipment that connects your camera to your optics. A quality digiscoping adapter ensures proper alignment between the camera lens and the eyepiece, preventing vignetting (the black circular tunnel effect) and providing a stable connection. Many brands offer universal adapters that fit various smartphones and eyepieces, while some provide custom-fit options for specific models.
Setting Up Your Digiscoping Rig
Stability is key to successful digiscoping. High magnification amplifies any movement, so a sturdy tripod is non-negotiable.
- Mount the Tripod: Set up your tripod on a stable, level surface. For maximum stability, extend the legs but keep the center column lowered.
- Attach the Optics: Mount your spotting scope or binoculars onto the tripod. Most spotting scopes have a built-in tripod mount.
- Attach the Adapter and Camera: Connect the digiscoping adapter to the eyepiece of your optics. Then, secure your smartphone or camera into the adapter, ensuring the camera lens is perfectly centered over the eyepiece.
- Final Adjustments: Focus your optics on your subject using the scope’s focus wheel. Then, fine-tune the focus using your camera’s manual focus or by gently tapping the screen. A remote shutter release (often a small Bluetooth button for smartphones) is highly recommended to take photos without touching the camera, eliminating any chance of blur from hand shake.
Tips for Better Digiscoping Results
- Avoid Digital Zoom: Once your camera is attached, resist the urge to use its digital zoom. This will only degrade the image quality. Instead, use the magnification of your spotting scope’s eyepiece to get closer to your subject. You can always crop the photo later.
- Optimal Lighting: Digiscoping works best in bright light. Overcast days or early morning/late afternoon light can provide excellent results, as they reduce harsh shadows and glare.
- Practice and Patience: The initial setup can be a little tricky. Take the time to practice aligning your gear and focusing. Like any form of photography, patience is a virtue, especially when photographing skittish wildlife.
Digiscoping opens up a world of possibilities for capturing incredible close-up shots of nature. With the right gear and a little practice, you can transform your outdoor viewing experience into a stunning photographic adventure. Stop into Leederville Optics, and let us show you how we can help you capture those incredible moments.